Confession: I am a pitiful documentarian. When I began to compose today’s post, I realized that while I was able to take any number of “after” shots of this remodeling project, I did not remember to take “before” pictures.
Fortunately I have another confession: I am extremely poor at deleting – much less organizing – computer files, so I was able to peruse a plethora of old digital photos for your viewing pleasure.
![]()
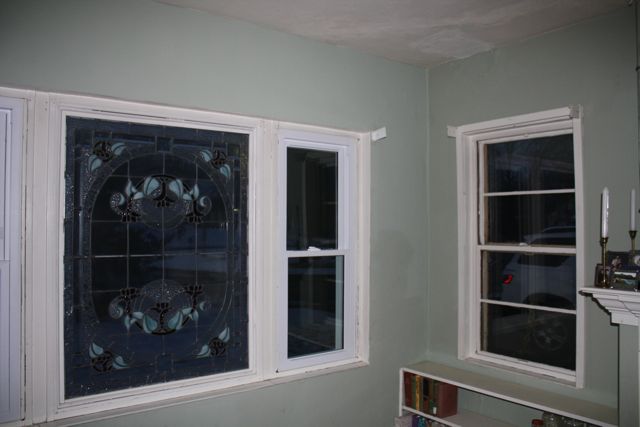
Phil, Hanna and I moved into this house (from across the street) in April 1995. The front room was freshly painted in a restful shade of seafoam green. The color went fine with our furniture so we opted to leave it.
Over the next 18 years we stenciled a border around the fireplace mirror, designed a stained glass window to fit the picture window, acquired various antique pieces and repaired some moisture damage in the southwest corner. With two additional children the walls took a normal share of abuse, but it was always far easier to touch up the existing color than to make a change.

Early this year we updated the drafty steel windows with energy-efficient vinyl replacements. This was a very good decision, although the old steel frames could not be completely removed and every one of the 18 windows would need touch-up paint.
I had never cared much for the floral valances and decided not to rehang them. I also did not like the shelves that had been built in on either side of the fireplace and asked Phil what he thought about removing them. He had no objection, so I got out a hammer and a crowbar and went to work. Before long, I realized this was turning into a Big Job.

Since the window treatments weren’t being rehung, I removed the curtain hardware and some wooden laths that had been cobbled into faux frames around the west windows. It was more than obvious that the room would require a major repaint. Phil gave me complete control over color, just as long as it wasn’t green.
Once the dust had settled from deconstruction, however, momentum came to a standstill as other circumstances demanded our attention. Hanna left for graduate school. Phil was unexpectedly laid off from his job. Laura and Joseph had busy summer schedules. Phil and I both applied for jobs. School started again for the kids and Phil went back to work for an IT consulting group. Both of the grandmas had eye surgery. By fall we had finally settled back into a semblance of normal routine and it was time to get back on the painting project. We wanted to finish by the time we hosted Thanksgiving dinner.
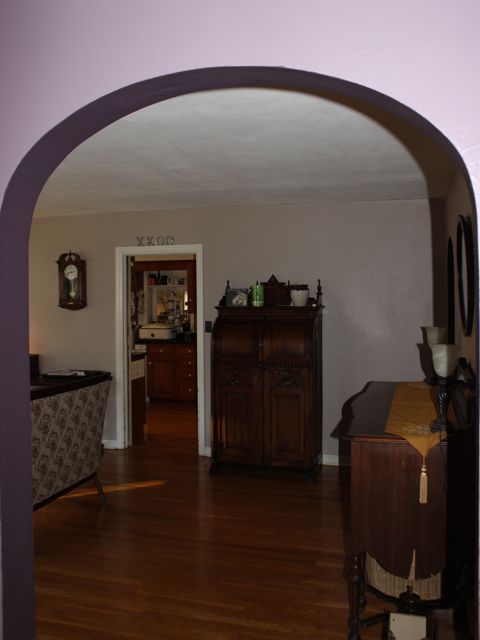
The project involved the front room, foyer and a hallway. The original color scheme was SW0103 – Bayberry in the front room and hall with a darker shade, SW1181 – Scrubbed Pine, in the foyer and inside the archways. All paint colors are from Sherwin Williams.

I put together a palette of three new colors, but first I had to patch the plaster and paint the ceiling. I used Valspar Color Changing Ceiling Paint from Lowe’s. It goes on purple and dries white so it is much easier to see what has already been painted. Then, because we were covering fairly dark colors, I prepped the walls with a primer tinted SW6035 – Gauzy White. Next I painted the hall and foyer in SW6270 – Soulmate, followed by SW6037 – Temperate Taupe on three walls of the front room and finished with SW6272 – Plum Brown for an accent wall and inside the archways (satin finish for all wall colors). Finally, I spray-painted all of the electrical outlet covers and switchplates and freshened up the mantel with the same color I had used on the window frames, SW7006 – Extra White in a semi-gloss finish. Cleanup included polishing the hardwood floor. I finished just in time for regular Thanksgiving preparations.
We are quite pleased with the final outcome. At first I was disappointed because I had envisioned the taupe walls as more brownish than mauve, but the color varies depending on lighting and coordinates well with the plum shades as well as the furniture. Bonus: the accent wall really pops the color of the flowers in the stained glass.

The remodel job is not quite finished. We still need to patch the baseboard where the bookshelves used to be – probably by harvesting baseboard from inside a closet – and all of the trim needs to be repainted. We plan to have the floors refinished and the hardwood guy instructed us not to paint the baseboards until after that has been completed. I can live with that!
![]()
In the interest of self-improvement, I would like to document a couple of things that were invaluable during this project. The first is the PaintStick, an ultra-cheap impulse buy from the clearance section at WalMart. It is a paint roller that draws paint directly from the paint can into a hollow handle. It saved both time and wear and tear on my back. The second is a series of instructional videos at the How to Paint a House Right! website that taught me proper painting techniques. I can now cut in a mean ceiling line without taping.
Next week: stories behind some of the antique pieces we have in the front room.

1 Response